How Do You Check Distributor Cap. If present, examine the points for wear and test their functionality. how to check and repair a distributor cap. if you have a car that’s more than 10 years old, with a distributor cap and you’ve been having problems like hard starting, the engine not starting, or recurring. utilize the multimeter’s resistance function to check for distributor cap and rotor continuity. The resistance of the suppression connections that run from the distributor cap to the cap should be. Then, connect the multimeter to the positive and negative terminals on the coil. Look for any cracks, corrosion, or other damage to the cap. How to adjust distributor cap. The first step in testing a distributor cap is to perform a visual inspection. there are several methods for testing a distributor cap, including visual inspection, multimeter testing, and spark testing. you can test a distributor cap and rotor by first removing the cap and checking its inside for any faults. You’ll want to look for problems, such as cracks, tiny holes, corrosion on the terminals, and excessive terminal wear. One of the best ways to check a distributor cap is to remove it and perform a visual inspection. Also, check if there is a gap between these components or not. Set the multimeter to ohms mode and check the reading.
from hirebother13.bitbucket.io
Set the multimeter to ohms mode and check the reading. you can test a distributor cap and rotor by first removing the cap and checking its inside for any faults. Assess the condenser’s capacitance if applicable. if you have a car that’s more than 10 years old, with a distributor cap and you’ve been having problems like hard starting, the engine not starting, or recurring. Also, check if there is a gap between these components or not. there are several methods for testing a distributor cap, including visual inspection, multimeter testing, and spark testing. First, remove the distributor cap and rotor. The first step in testing a distributor cap is to perform a visual inspection. how to check and repair a distributor cap. The resistance of the suppression connections that run from the distributor cap to the cap should be.
How To Clean Distributor Cap Hirebother13
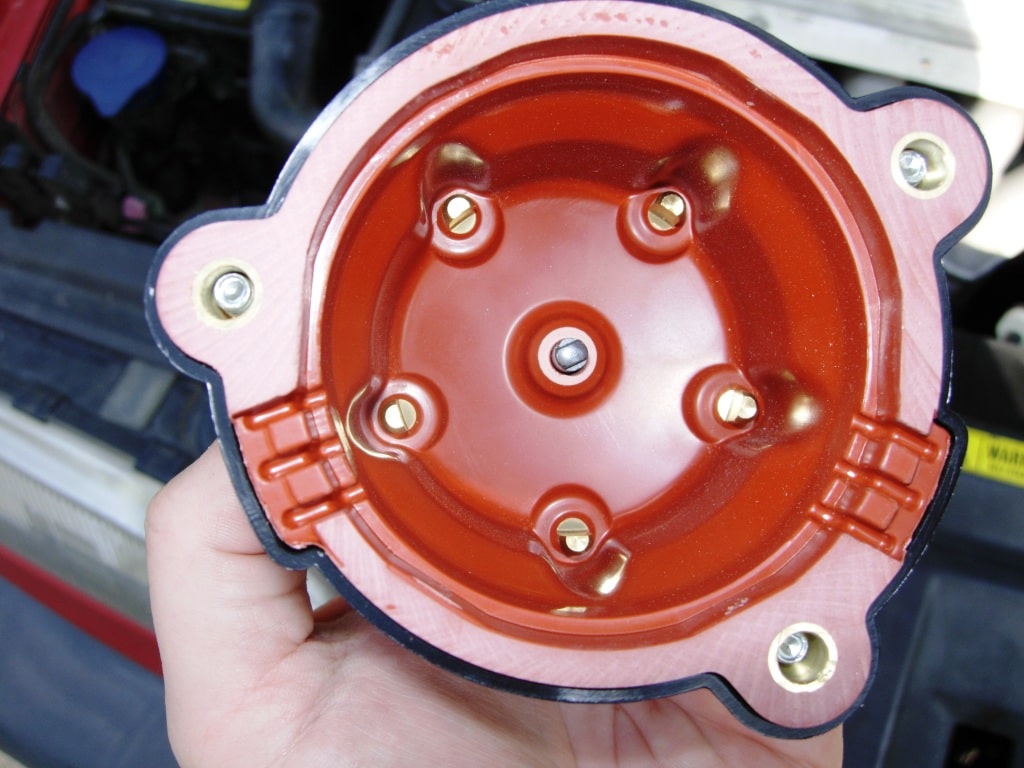
How Do You Check Distributor Cap One of the best ways to check a distributor cap is to remove it and perform a visual inspection. How to adjust distributor cap. Then, connect the multimeter to the positive and negative terminals on the coil. The resistance of the suppression connections that run from the distributor cap to the cap should be. there are several methods for testing a distributor cap, including visual inspection, multimeter testing, and spark testing. Set the multimeter to ohms mode and check the reading. As for the rotor, you have to remove it as well and look inside at the wiring. The first step in testing a distributor cap is to perform a visual inspection. you can test a distributor cap and rotor by first removing the cap and checking its inside for any faults. Look for any cracks, corrosion, or other damage to the cap. You’ll want to look for problems, such as cracks, tiny holes, corrosion on the terminals, and excessive terminal wear. utilize the multimeter’s resistance function to check for distributor cap and rotor continuity. First, remove the distributor cap and rotor. to test the distributor, you’ll need a multimeter. One of the best ways to check a distributor cap is to remove it and perform a visual inspection. Assess the condenser’s capacitance if applicable.